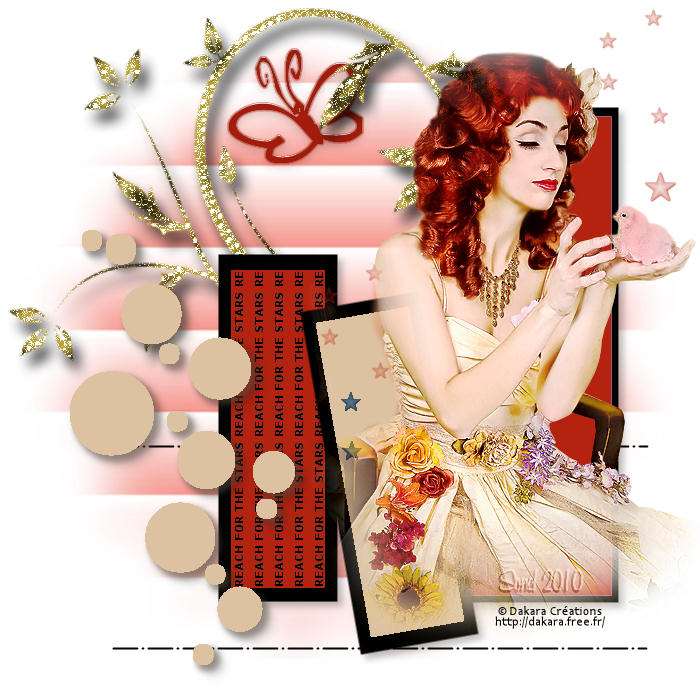

Alternative Version by
Sonel and Snakelady

Snakelady's Dutch Tutorials
translated into English by
Sonel
with permission from the creator, Snakelady

Snakelady's
Original Tutorial
here in Dutch

Download
all the Supplies
HERE
The
Template was made by Snakelady herself and may
NOT be used in other tutorials.
Place the Brush in the Brush Folder and open the rest of the
Supplies in PSP.
Open the Template, as we are going to work with it.

Use this pencil to show
you where you are in the tutorial.
Just left click on it and drag it to where you want it to go.
The pencil will stay in position until you close your browser.

Drag and Drop Script: © Dynamic Drive (http://www.dynamicdrive.com)

LET'S START!
(Remember to save often!)
Activate
the Layer : white background.
Layers - New Raster Layer.
Flood Fill the Layer with a colour from your tube.
I used : #678ba7.
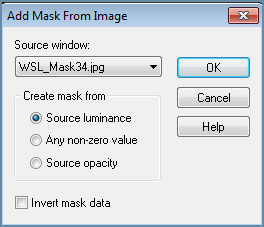
Layers - New Mask Layer - From Image :
Source Window : WSL_Mask34.jpg, with the following settings:

Layers -
Merge - Merge Group.
Activate the Layer : butterfly
Copy : donnaK_accents_1143-5.pspimage and Paste as New Layer.
Move to the left and to the top.
Add colour to all the white rectangles, by selecting the Layer and
to
Flood Fill the Layer with a colour from your tube.
I used : #d8c291 and #678aa6 for the small white rectangle.
Activate the Brush Tool and look for the Brush : staraccents002.
Apply in the middle rectangle with the colour : Black.
Copy the tube : jkhkchicaslocaslkj.png and
position it on the black border of the big rectangle on the right.
Apply Drop Shadow : 5; 5; 25; 10 Black.
Activate the Layer : balls
Selections - Select All - Selections - Float.
You can re-colour the balls with a colour of your choice.
Selections - Select None.
Layers - Merge - Merge All (Flatten).
Place your watermark and name.
Font used : CamelliaD

Alternative Version by
Snakelady

Back to
Top

Alternative Version by Sonel

Back to
Top

Do you want to show Snakelady your result of her
tutorials?
Become a member of her showbord and show her what you've made.
This group was specially created for others to show their results.
Click on the Banner to go
there.

I hope you had much pleasure in doing this tutorial.
Please leave the names and watermarks on the tubes intact.
Do not use anything without Snakelady's
permission and NO hot-linking please.
If you want to use her tutorial for other purposes,
please ask permission first.
©Snakelady 06-05-10 All Rights Reserved.

TUTORIALS INDEX
|


