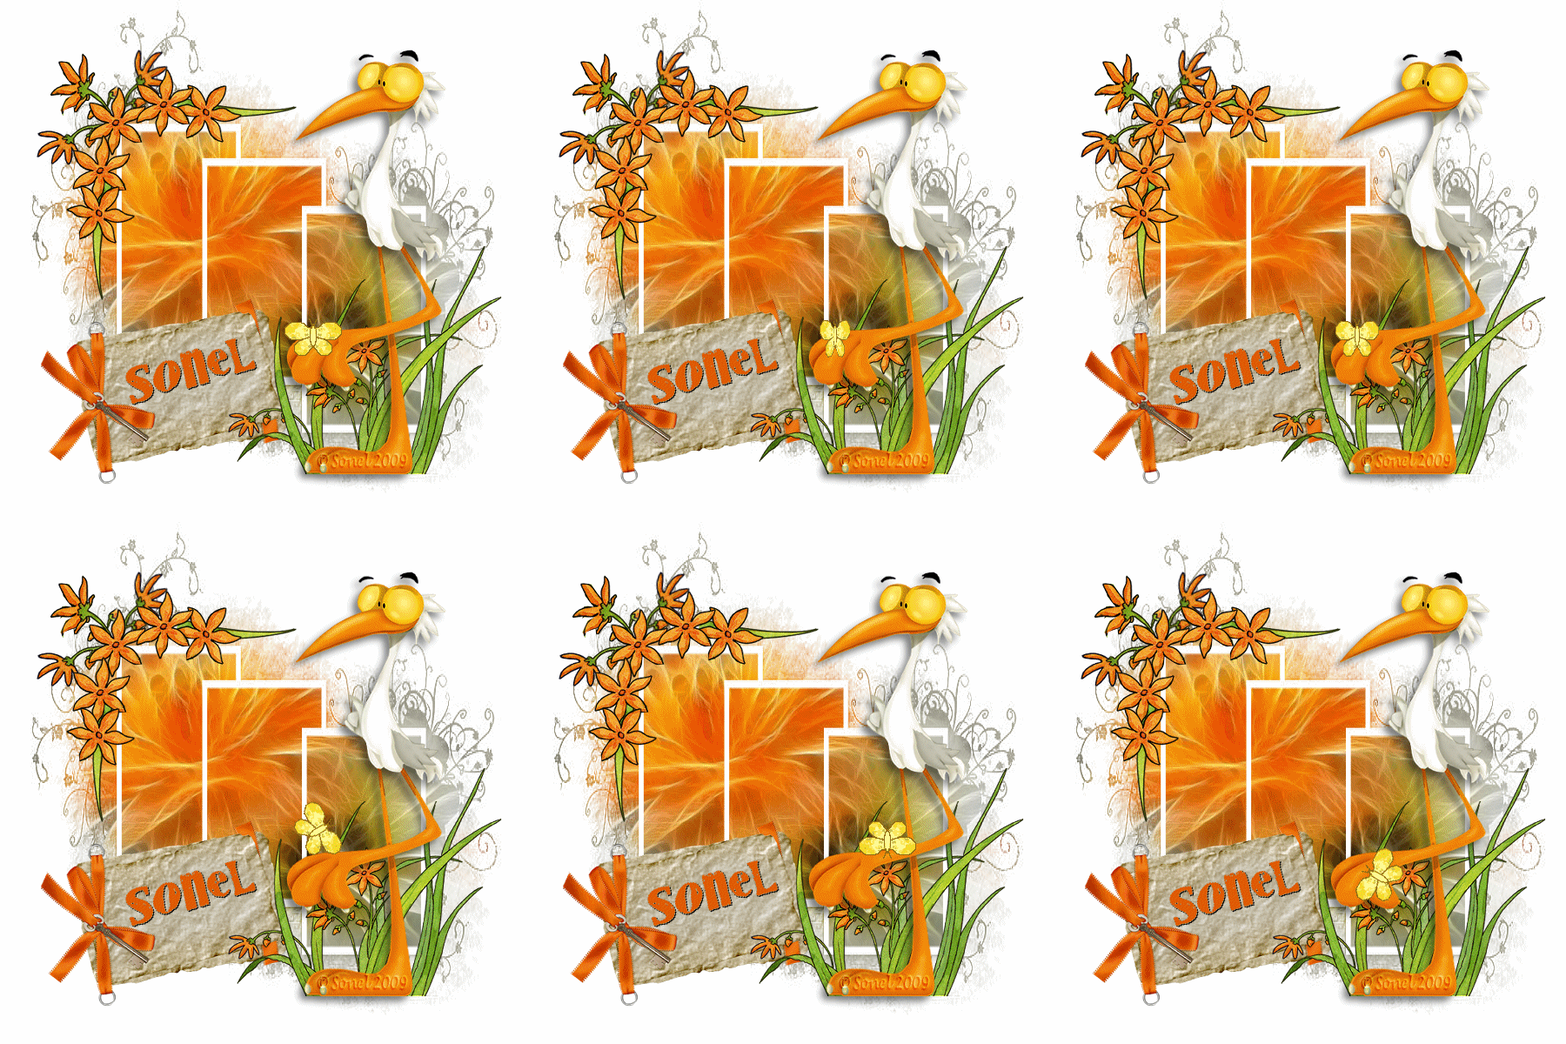
Open a New Image : 600 x 600 White.
Layers - New Raster Layer.
Floodfill this Layer with the colour : #aeab9b.
Copy the tube "natures-pincushion_lizztish.psp" and Paste as New Layer.
Lock the bottom Layer (Background).
Layers - Merge - Merge Visible.
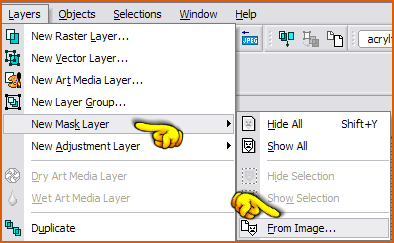
Layers - New Mask Layer - From Image...

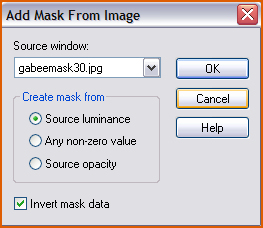
Add Mask From Image.
Look in the Source window : gabeemask30.jpg
Invert Mask Data.

Effects - Edge Effects - Enhance.
Layers - Merge - Merge Group.
Copy the corner (corner-printemps-snake.pspimage) and Paste as New Layer.
Move to the left - see header example.
Copy UpLegStork.psp and Paste as New Layer.
Move to the right.
Apply Drop Shadow : 6,-6,50,12 Black
Copy "flower_jazzle_2009_01.pspimage" and Paste as New Layer.
Move it to the right as well, with the bottom part on the same height as the Stork's feet.
Layers - Arrange - Move Down.
Copy "journalling.pspimage" and Paste as New Layer.
Move down to the left.
Layers - Arrange - Move Down.
Add your name, text or watermark.
Layers - Merge - Merge All (Flatten).

ANIMATION
To add the animated butterfly:
Copy your image and Launch Animation Shop.
Right click on the grey area in Animation Shop - Paste as New Animation.

Now you will have one frame.
Duplicate the frames until you have 21 frames.
Edit - Select All Frames (CTRL-A)
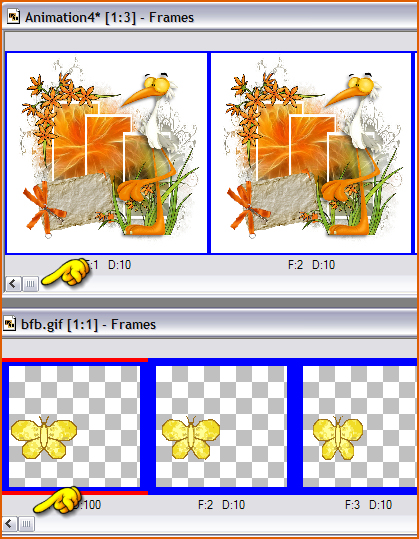
Move the slider to the left.
Open the Butterfly Animation (bfb.gif)
There are 21 frames as well.
Edit - Select All Frames (CTRL-A)
Move the slider to the left as well.

With the left mouse button pressed in, pull the first frame of the Butterfly animation
onto the first frame of your copied image and place the Butterfly where you want it.
When you are satisfied, let go of the mouse button.
When you are satisfied with your Animated, save as a .gif file.
