Open the template (Template88.pspimage) and
lock all the Layers, except the white background Layer.
Activate the white Layer (Raster 1).
Copy the doodle (doddle.pspimage) and Paste as New Layer.
Move to the left, bottom corner.
Layers - Duplicate - Image - Flip.
Unlock all the Layers except the Watermark Layer (DenzDesignz).
Activate the layer : star doodle.
Selections - Select All - Selections - Float.
Open the Scrapkit (verassing-week-17.pspimage) and unlock all the Layers,
except the Watermark Layer.
Copy "Achtergrond 1" of the Scrapkit and Paste into Selection.
Effects - 3D Effects - Drop Shadow : 1, 1, 50, 12 Black
Selections - Select None.
Activate the Layer : 3 frames back.
Selections - Select All - Selections - Float.
Edit - Paste into Selection (the background is still in the clipboard memory)
Selections - Select None.
Activate the layer : circle back.
Selections - Select All - Selections - Float.
Edit - Paste into Selection (the background is still in the clipboard memory)
Selections - Select None.
Activate the Layer : star cluster.
Selections - Select All - Selections - Float and Paste into Selection.
Effects - 3D Effects - Drop Shadow : Same settings as before.
Selections - Select None.
Go back to the Scrapkit and copy : Achtergrond 2.
Activate the Layer : 3 frames.
Selections - Select All - Selections - Float and Paste into Selection.
Effects - 3D Effects - Drop Shadow : Same settings as before.
Selections - Select None.
Activate the Layer : circle frame.
Selections - Select All - Selections - Float and Paste into Selection.
Apply the same Drop Shadow.
Selections - Select None.
Activate the Layer : Raster 2.
Selections - Select All - Selections - Float and Paste into Selection.
Apply the same Drop Shadow.
Selections - Select None.
Activate the Layer : circle back again.
Selections - Select All - Selections Float - Selections - Invert.
Copy the tube and Paste as New Layer.
Make sure the head/image fits into the frame.
Press Delete.
Selections - Select None.
Activate the Top Layer.
Copy the heart (Hart) from the Scrapkit and Paste as New Layer.
Move to the right.
Erase a part of the hanging coil.

Apply the same Drop Shadow.
Arrange this Layer below the Layer of the star cluster.
Activate the Top Layer.
Go back to the Scrapkit and copy the bow (Strik) Layer and Paste as New Layer.
Image - Resize : 5x 85% bicubic and apply the same Drop Shadow.
Place the bow in position.
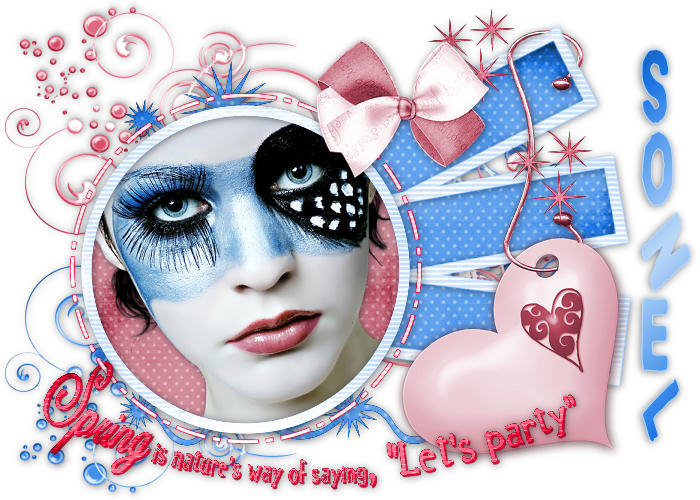
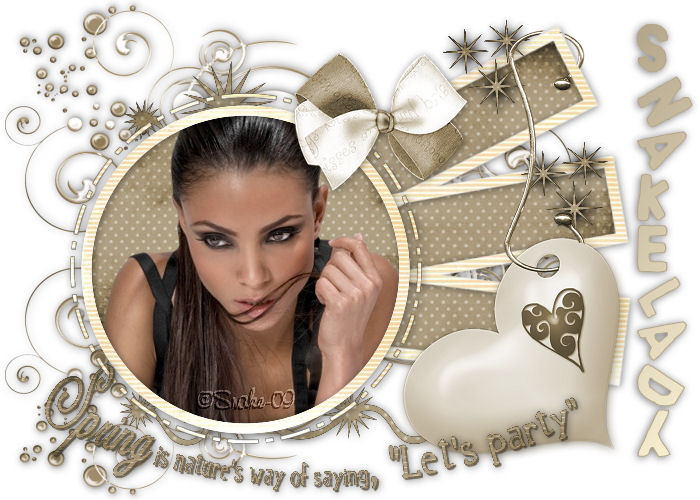
Copy "spring_is_nature's_way_of_saying_let's_party.png" wordart and Paste as New Layer.
Position at the bottom of your image.
Selections - Select All - Selections - Float.
Go back to the Scrapkit and copy the Layer "Achtergrond 1" again
and Paste into Selection.
Apply the same Drop Shadow.
Selections - Select None.
Layers - Merge - Merge All (Flatten).
Place your watermark and/or name.
Open the font (Lethality).
Image - Rotate Counterclockwise90 (PSP 9).
Type your name with the font, Lethality and apply the same Drop Shadow.
Image - Rotate Clockwise 90 (PSP 9).
Alternative Version by Snakelady
Back to Top
Alternative Version by Sonel