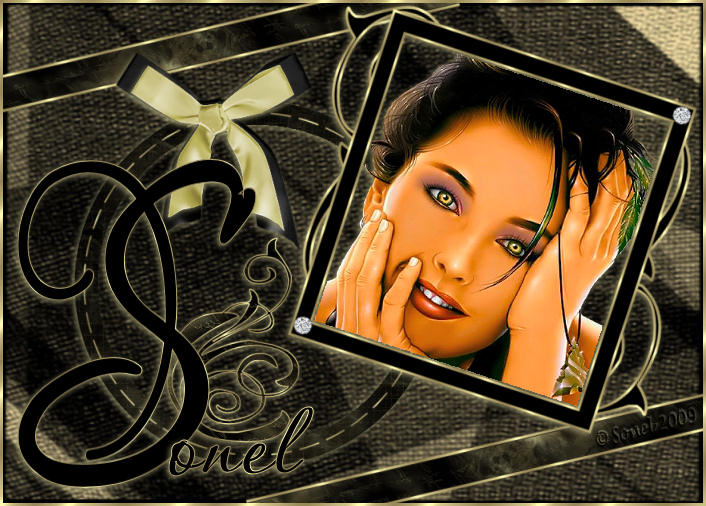
Open a New Image : 700 x 500 Black
Layers - New Raster Layer.
Selections - Select All.
Copy raster 4 from the minikit and Paste into Selection.
Selections - Select None.
Copy raster 7 from the minikit and Paste as New Layer.
Move to the right and to the top.
Copy raster 13 (circle frame) from the kit and Paste as New Layer.
Move to the left and to the bottom.
Layers - Arrange - Move Down.
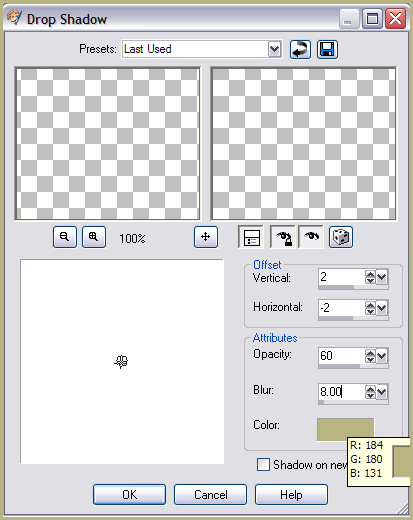
Effects - 3D Effects - Drop Shadow - Colour : #b8b483
Activate the Top Layer.
With the Magic Wand Tool, select the inside of the frame.
Open the woman tube : Image - Mirror.
Copy and Paste into Selection.
Selections - Select None.
Effects - 3D Effects - Drop Shadow - with the same settings as before.
Copy raster 8 from the minikit and Paste as New Layer.
Move it in the circle frame.
Apply the same Drop Shadow.
Copy raster 5 from the minikit and Paste as New Layer.
Move to the left top.
Layers - Arrange - Move Down (2x)
Layers - Duplicate.
Image - Mirror - Image - Flip.
Activate Top Layer
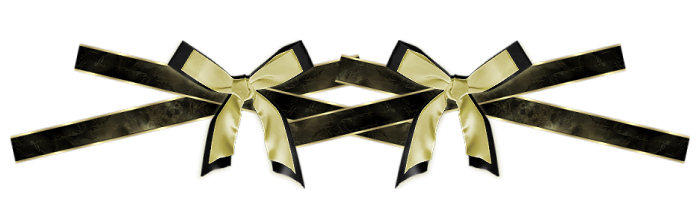
Copy raster 6 (black ribbon) and Paste as New Layer.
Move it to the top of the circle frame
Apply the same Drop Shadow.
Copy raster 9 (yellow ribbon) from the minikit and Paste as New Layer.
Move it on top of the black ribbon and apply the same Drop Shadow.
Open the font : PassionsConflictRob (included in Supplies).
Set the size on 250.

Set the foreground colour to a gold pattern and the background colour to black.
Type the first letter of your name.
Move it to the left and down and pull the letter a little to the top.
Now you can type the rest of your name, with the font size at : 72.
Move it into position
Layers - Convert to Raster Layer.
Apply the same Drop Shadow.
Layers - Merge - Merge All (Flatten).
Image - Add Borders : 3 pixels White.
Select the border with your Magic Wand and Floodfill with the Gold Pattern.
Selections - Select None
Add your watermark and save.
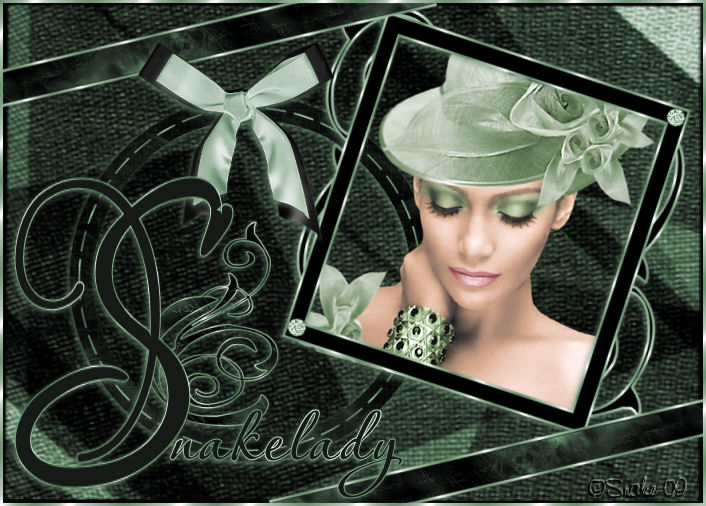
Alternative Version by Snakelady
Back to Top
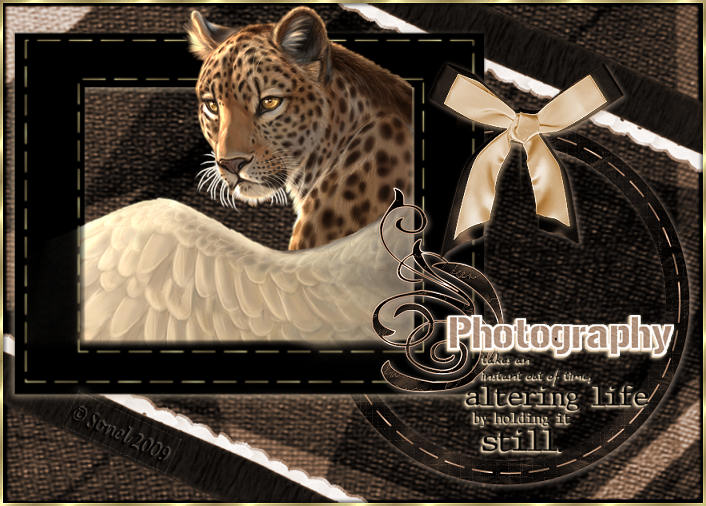
Alternative Version by Sonel
Back to Top