New Image : 700 x 500 White.
Layers - New Raster Layer
Flood Fill this layer with a colour from your frame or tube.
I used the colour : #e7761e
Layers - Load/Save Mask - Load Mask from Disk : 0113DWORISCH,
with the following settings:
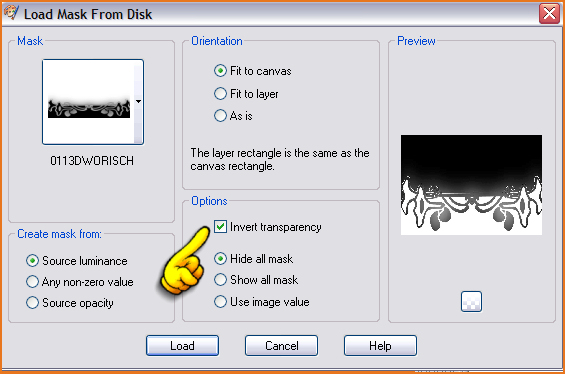
Layers - Merge - Merge Group.
Copy Tripleframe-snake.pspimage and Paste as New Layer.
Leave as it is.
Layers - New Raster Layer.
Activate the Selection Tool and draw a rectangle on the Frame in the middle.
Copy the tube (kTs_43cV_12.psp) and Paste into Selection.
Layers - Arrange - Move Down.
Selections - Select None
Activate the Top Layer.
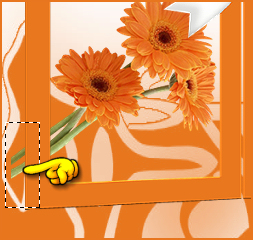
Copy the tube (gerberas.pspimage) and Paste as New Layer.
Move into the left Frame.
Layers - Arrange - Move Down.
With the Eraser Tool, delete part of the stem that falls outside the Frame.
Activate the Top Layer.
Activate the Selection Tool and draw a selection in the Frame on the right.
Layers - New Raster Layer.
Copy the wordart (HAPPYMOTHERSDAY_KKAT47.png) (or use other text or a tube)
and Paste into Selection.
Layers - Arrange - Move Down.
Activate the Top Layer.
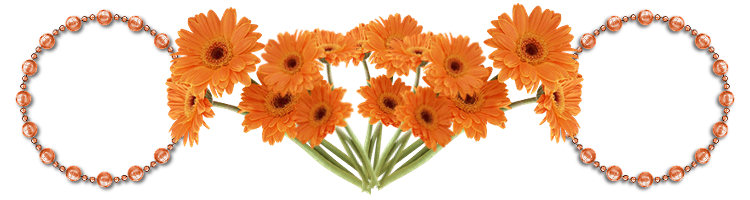
Copy "Pearlframe.pspimage" and Paste as New Layer.
Move it a bit to the right.
Layers - Duplicate - Move down below the Layer of the Tripleframe (Raster 1).
Activate the Top Layer (Raster 5) - the Pearlframe
Eraste the part on the left that falls over the Frame.
You can also go to the Copy of the Frame (Copy of Raster 5)
and erase the part of the Pearlframe that shows under the Tripleframe.

Activate the Layer of the Tripleframe (Raster 1).
Effects - 3D Effects - Drop Shadow : -10, -8, 100, 75 Black.
Layers - Merge - Merge All (Flatten).
Place your watermark and name
I used the font : Highland Perk (included in the Supplies).
To round it off, you can add a border of 1pixel with a colour of your choice.
Alternative Version by Snakelady

Back to Top
Alternative Version by Sonel